How
to Create a
Poster with PowerPoint
Part 1 of 2
View/Print Adobe Acrobat Version of Part 1 & 2
| Go
to: Main Poster Page | Part
2 of "How To"...
|
||
|
PRELIMINARY
COMMENTS: If you are a PPt user already - great. You may learn some new tricks here. This is a "work in progress." If you find errors or have suggestions for improvment (or if my instructions strand you somewhere along the way) please let me know. I will use your feedback to make this better for future users. You can e-mail me at sbonham@georgiasouthern.edu Thanks
in Advance, OVERVIEW
(what you are getting yourself into):
|
||
|
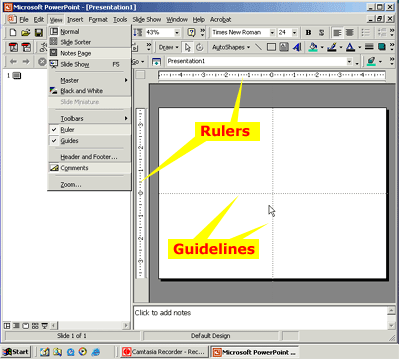
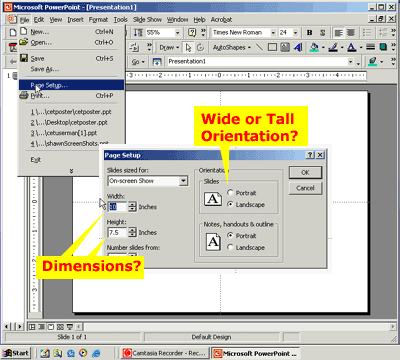
First, let's have PowerPoint layout a single large slide for us in a window that makes the creation of poster elements easier. 1. There are two viewing aids that are not ordinarily visible in PowerPoint; the ruler and the guides. To display them select each in turn from the view menu. |
 |
|
| 2. You'll need as much "screen real estate" as possible when designing a poster. The default view in PowerPoint is the "hybrid" view where the outline, slide and speakers notes panes are all accessible. Click the "working slide" view button to maximize the slide pane. | 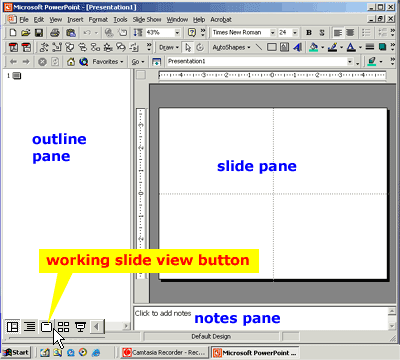 |
|
|
3.
Okay- that's better. |
 |
|
| 4. Select the text tool-- then click-drag the I-beam cursor within the working slide area to create a text box. Type the title for your poster. YES(!)- it will be so tiny you won't be able to read it. That's okay. We'll increase the text size, color, alignment, etc. later. | 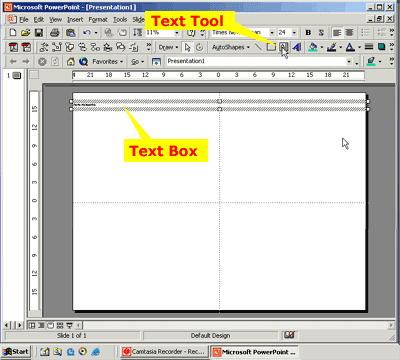 |
|
| 5. The reason you cannot read the text is because we've made the slide so large (when we changed the page set-up). Powerpoint wants to display the entire slide in the slide pane so it has scaled the image down to fit. Look at the slide scale here. The slide is shown at 11% of its true size. The text you typed is 24 point but it looks more like 3 point! | 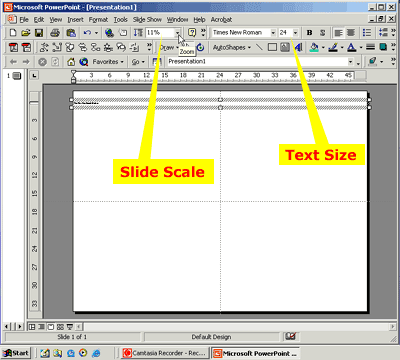 |
|
|
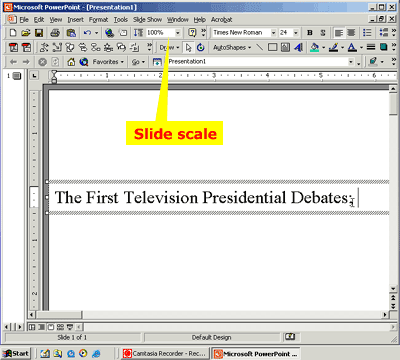
6. How big is the text really? Select 100% from the slide scale pulldown and you can see the true size of the text- BUT then you won't see very much of the rest of the poster! Select "Fit" from the Slide scale pulldown again to see the entire slide. Notice that the scale shows a percentage again after you do so. |
 |
|
|
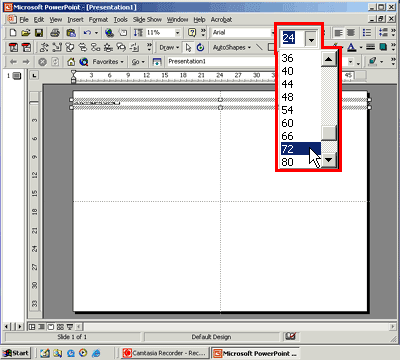
7. Let's increase the size of the text. 24 point text does not make an impressive title. With either the text selected (highlited) or the text box selected, choose a larger text size from the text size pulldown (enlarged here). There are 72 points to an inch. Let's see how large 1 inch text appears. If nothing changes you probably did NOT have the text or the text box selected! Read about selecting the text or text box. |
 |
|
|
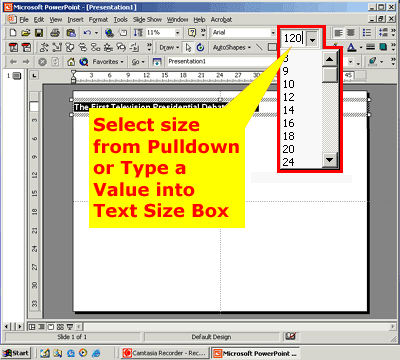
8. Okay- 72 Looks pretty LARGE- but could it be larger? Sure! You can select a size up to 96 points from the pulldown-- BUT you can type a point value into the text size box. The limit is somewhere beyond 3000 points (that's around 40 inch text!). In most cases your title needn't be any larger than 2 inches (144 points) in height - and subtitles should probably be around half to three-quarters of the title size. I personally favor 90 to 120 for the title and 48 for the sub-title. I attempt to get the poster title onto ONE line. |
 |
|
|
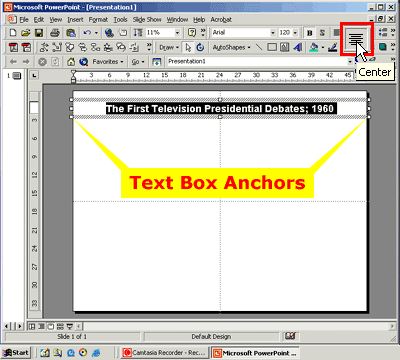
9. 120 Point text looks pretty good. Now let's center align the title. With either the title text or the text box selected click the center align button. If the text box is not sized so that it extends completely across the slide, resize it now. To do so click-drag a text box anchor (the little squares located on the border of the text box) to shrink or extend it. |
 |
|
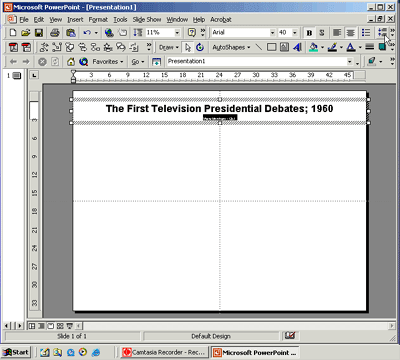
| 10. Click at the end of the title - hit the enter/return key to drop to the next line and type a subtitle (usually the presenter(s) and affiliation(s). Select the subtitle text and reduce the text size. | 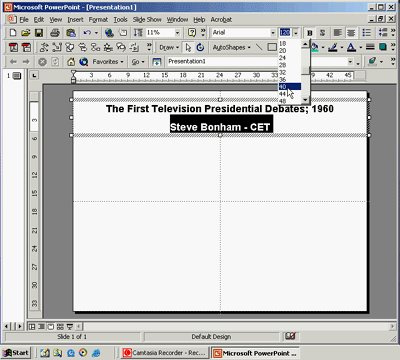 |
|
|
11. Cool. But there is too much space between the title and the subtitle. Can the line spacing be changed? Of course it can. Select the subtitle and click the "tighten line spacing" button. What? You don't have that button?! Yeah. It's not a "default button." So Let's talk about how to add a button. |
 |
|
|
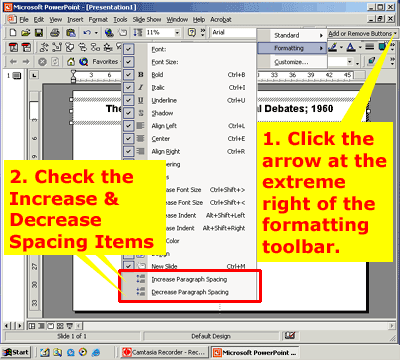
11B. Look on the far right side of the text formatting button bar. The text formatting button bar has the font, font size, and alignment buttons on it. Click the right pointing arrow and look for add/remove buttons. Check the menu items shown at right to add buttons to the button bar for decreasing and increasing line spacing. Now you can go back and do step 11 above. |
 |
|
|
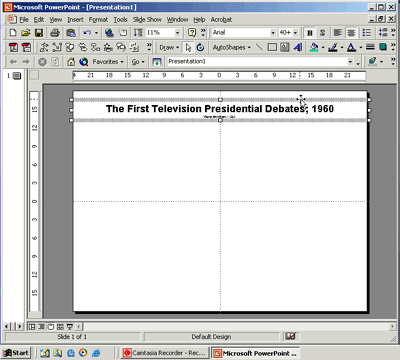
12. Now let's move the title text box up a bit. Position your pointer atop the border of the text box. Notice that the pointer icon changes into a "t" composed of arrows. Click-hold on the border and you can drag it to a new location using your mouse. OR, you can click the border to select the text box and then use your arrow keys on your keyboard to move the box to a new location. Move the text box closer to the top of your poster. |
 |
|
|
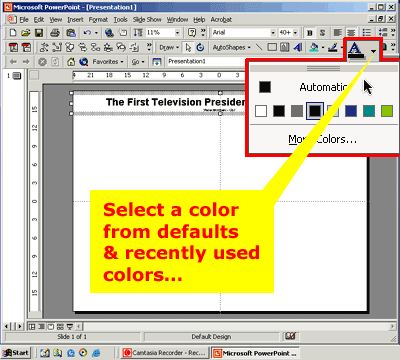
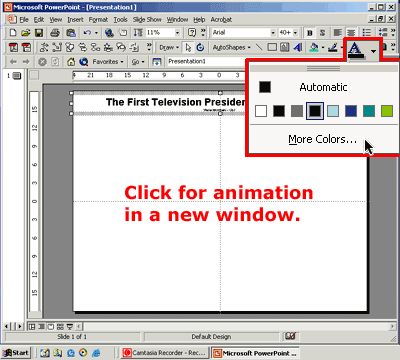
13. A Black Title is sooo basic. Let's jazz the title up with some color. Select the text box or the portion of text within the text box that you wish to change.
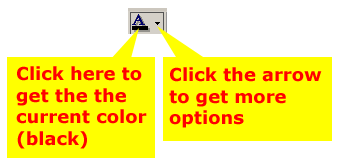
Click on the text color pulldown (the downward pointing arrow just to the right of the text color icon) button and choose one of the colors provided or... |
 |
|
|
14. Click More Colors... to select from 256 standard colors or from the custom spectrum that offers millions of colors. Click the still image at right to see an animation of this. |
 |
|
|
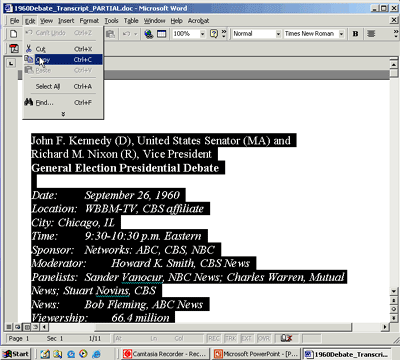
15. Now let's place some text from another source on the poster. Keep PowerPoint running while you open a Microsoft Word document (or a webpage perhaps). Select & copy some text from that document.
Go back to your PowerPoint poster. |
 |
|
| 16. Select the text tool again and create a text box. The cursor will be blinking within the new text box. Select: Edit > Paste from your menus and the text will appear in the text box. | 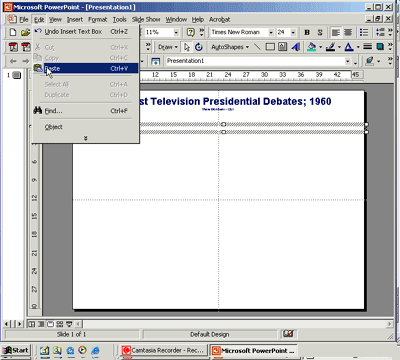 |
|
| 17. The text will probably appear in the default font and size (Times & 24 point). With the text box selected choose 12 point from the text size pulldown. | 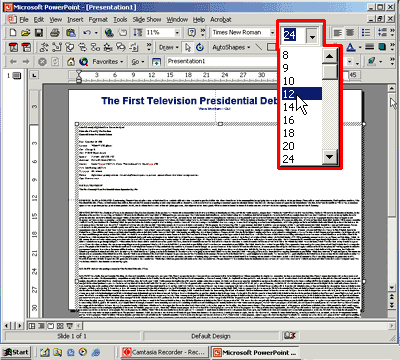 |
|
| 18. ...and the text box may be quite wide. Click hold on a text box anchor to resize the text box. | 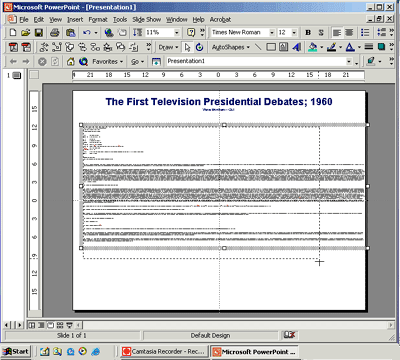 |
|
| 19. Release the anchor and the text will wrap to fit the width of the box. It's difficult to tell how wide this text area is- and if the text is readable (it certainly doesn't appear so at this scale!) | 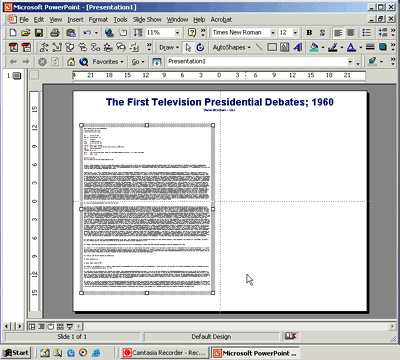 |
|
|
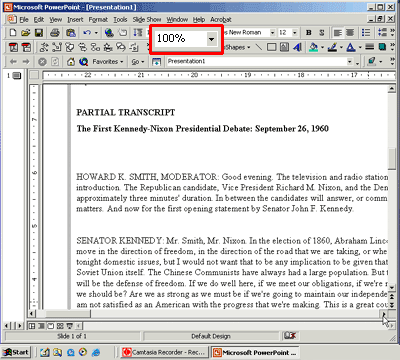
20. If you zoom in to 100% you can see it better. At 100% you can see it is readable but you can't see enough of the ruler to determine the width of the text box. Why
is this important? A maximum width is nine to ten inches-- about what you'd encounter on a landscape oriented piece of 8.5 x 11 inch paper. |
 |
|
| 21. To determine or set the width of a text box right-click on the border of the text box and select "Format Text Box..." from the pop-up menu. | 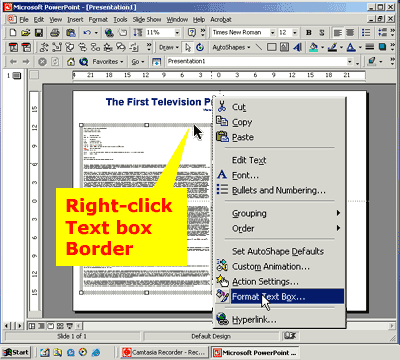 |
|
|
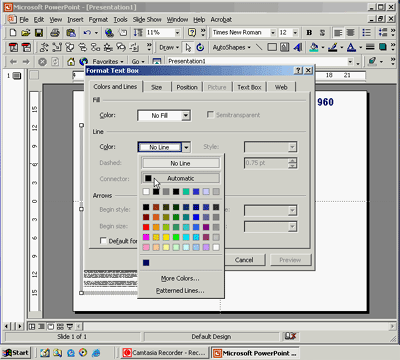
22. The "Format Text Box" dialog box offers five tabs; Colors & Lines, Size, Position, Text Box, and Web. In the Colors & Lines section you can set the background color of the text box and place a colored border around the text box. This is particularly useful if you have a colored background or a picture as the background of your poster. You can make the text box appear as a piece of paper atop the background. Sample below.
|
 |
|
