How
to
Create a Poster
with PowerPoint
Part 2 of 2
| Go
to: Main Poster Page | Part
1 of "How to..." |
Part 2 of "How to..."
|
||
| 23. In the Size area you can set the width (and height if desired) of the text box. I'm setting the width here to 8.5 inches. |  |
|
| 24. The Text Box tab allows you to set margins about the text. This is really useful when you use a fill color and/or a border. You can also tell PowerPoint to vertically align the text to top, middle, or bottom of the text box here. I'm setting my margins to 3/4" left and right and 1" top and bottom. | 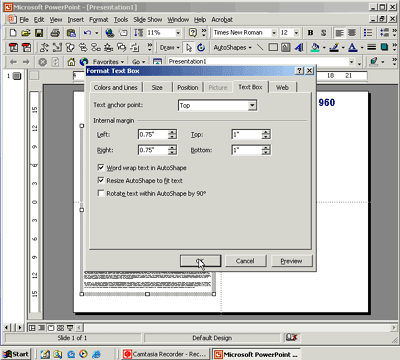 |
|
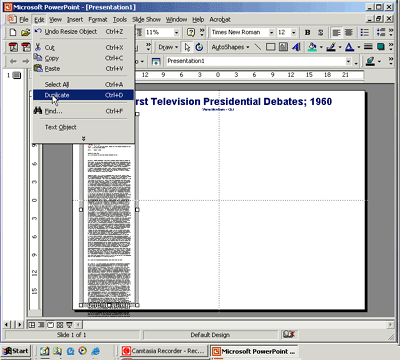
25. So-- this text box has lines of text that are 7 inches wide (8.5 - (sum of left & right margins)). That should be easy to scan even if I make the text 12 point or so. It appears that using this text box width the text passage is too long to fit. So that I don't have to repeat the text box formatting process I'll just "clone" the existing text box. To do so, with the text box selected, chose: Edit > Duplicate from your menus. OKAY.
Before going to step 26... |
 |
|
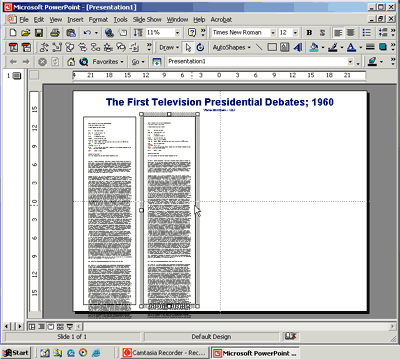
26. An identical text box with the cloned text inside will appear atop the original one. Click-hold on the border of the cloned box and move it over beside the original. Then- you have to do some "cleaning up" to do. The two text boxes contain identical passages at this point. You'll need to delete the overrun (the text that is off the poster in image #25 above) from the bottom of the original text box, and then eliminate all BUT the overlap from the cloned text area. |
 |
|
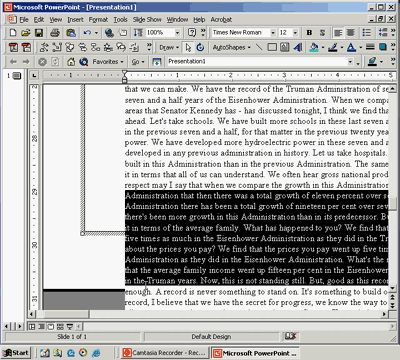
27. Zoom in on the original text box to determine where the break should occur. If you just have a little text overrun you may decide to:
Any one of these, or a combination may do the trick. |
 |
|
28. Okay that works. However, the text boxes are not aligned. There is an easy way to do this. First you must select both text boxes. Click one, then hold the shift key down and click the second one. |
 |
|
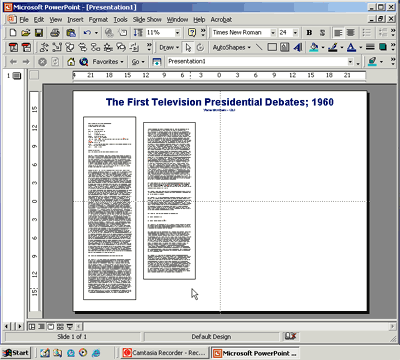
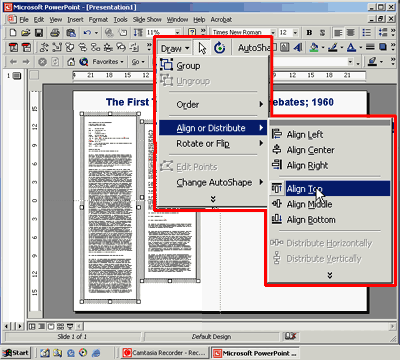
29. With both text boxes selected click on the Draw pulldown and select: Align or Distribute > Align Top. The tops of both text boxes will be perfectly aligned.
OKAY.
Before going to step 30... |
 |
|
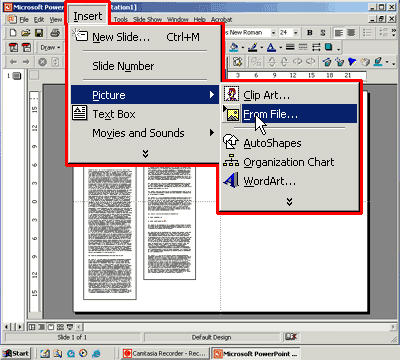
30. Now let's insert an image. Select: Insert > Picture > From File... Browse to the image file you desire to use. It should be a jpeg, or gif image. WARNING!
|
 |
|
| 31. Once you've located the image click "Insert." | 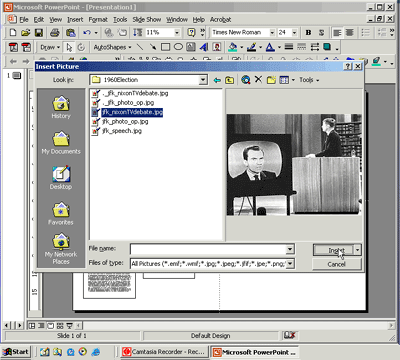 |
|
| 32. The image will appear centered on your poster in it's original size. You can click-drag the image to move it to another location... | 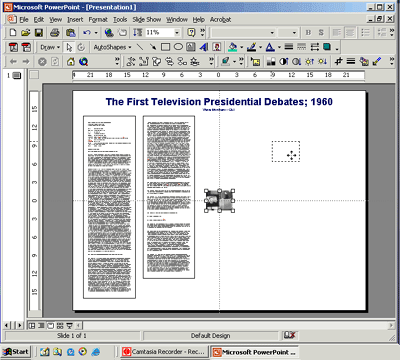 |
|
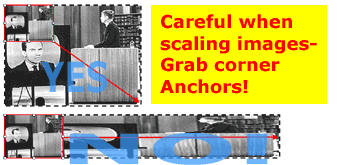
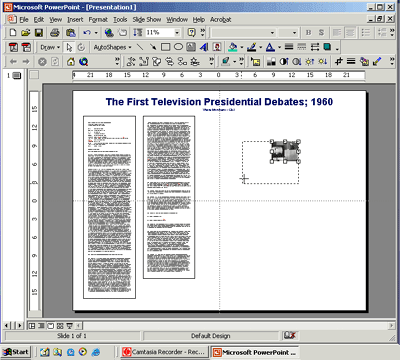
33. and/or expand or shrink the image to the desired size. To do so, click-hold an anchor on the CORNER of the image and drag it outward to increase its size, or inward to reduce its size proportionally. If you DO NOT use a corner anchor the image may badly distort.
|
 |
|
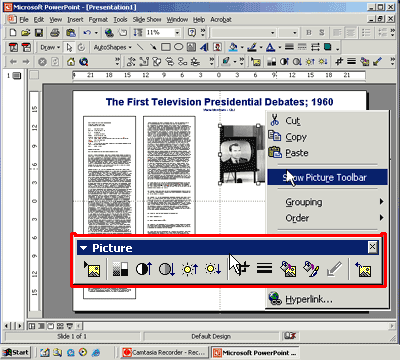
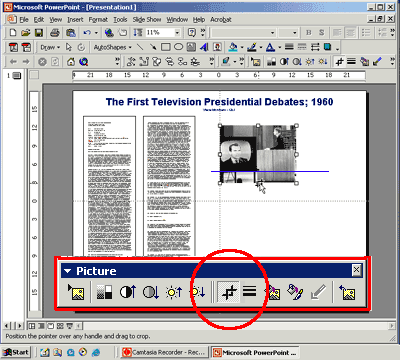
34. Right-clicking an image displays a pop-up menu with many options that provide for: cropping &/or brightening the image, and adding a border to the image. Let's investigate... Right-click the image you inserted. Select "Show Picture Toolbar" from the pop-up menu. The picture toolbar will appear. If your pop-up menus offers "Hide Picture Toolbar" that indicates that the picture toolbar is already open on your computer. It may be docked in the buttonbar area of your screen. |
 |
|
35. Select the cropping tool (circled in red at right) in the Picture Toolbar. The pointer will become the cropping pointer icon. Click-hold atop an anchor on the border of the image and crop the image so that the bottom of the image is just below the bottom of the television screen (about where the blue line is). Don't worry-- you are not modifying the original image and you can un-crop it if desired later. OKAY.
Before going to step 36... |
 |
|
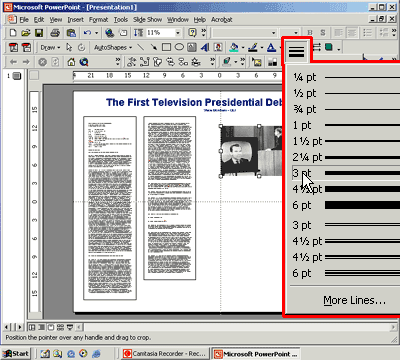
36. Now let's place a solid border around the image. With the now cropped image selected select a line thickness option from the buttonbar pulldown. I'm selecting a 3 pixel border. The border's color will be black by default. Of course, you can resize or relocate the image after adding a border. |
 |
|
| 37. Now let's insert another type of image... One from the Microsoft Clipart Gallery. Select: Insert > Picture > Clip Art... | 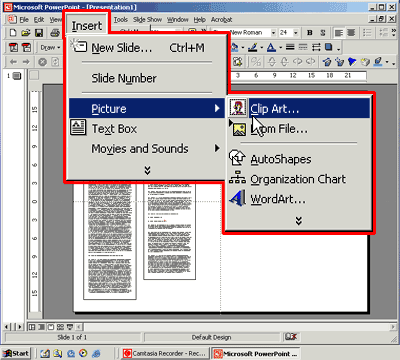 |
|
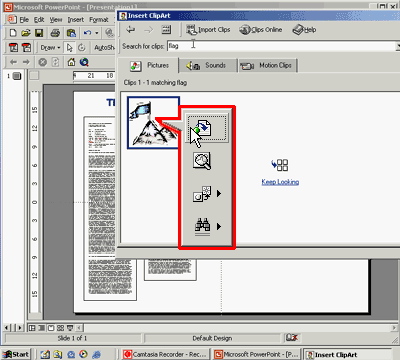
38. Browse the gallery - or search by keyword. I'm looking for a US flag so I'm searching for "flag." If you find an image that is appropriate you can insert it on your slide by clicking the top-most item from the pop-up menu. However, this is not what I am looking for so I'm going to show you a really useful Microsoft weblink in the next step. |
 |
|
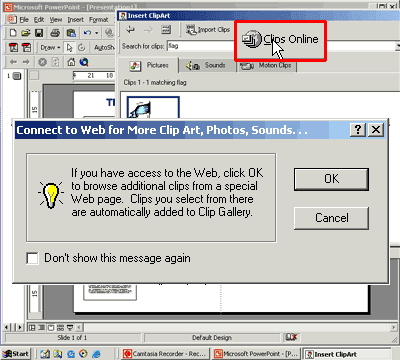
39. With the ClipArt Gallery open, click the "Clips Online" button- then click "OK." You'll do need an active Internet connection. The URL for the Design Gallery live is: |
 |
|
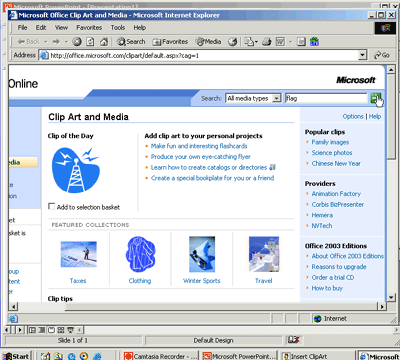
40. Your web browser will open to the web site shown at right where you can search by keyword and download all kinds of cool stuff to add to the Clipart Gallery. I'm searching for "flag" again. |
 |
|
| 41. Here's what I'm looking for! Click the checkbox beneath the image to mark it for download. | 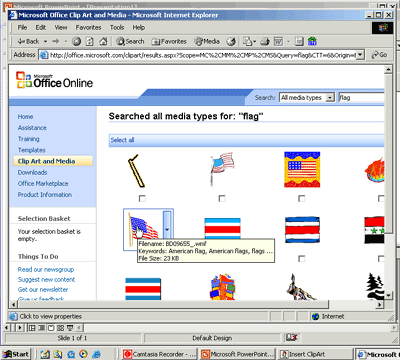 |
|
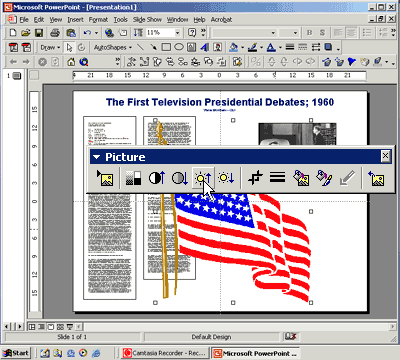
42. Then download it and select: Insert> Picture > Clip Art... This time the search keyword "flag" should turn up the image you just added to the ClipArt Gallery. I'm planning on using this image as a background so I'm going to enlarge it and I'll need to brighten it so that it will blend into the background better. You can brighten an image via the Picture Toolbar- look for the sunshine with the UP arrow beside it. Brighten it so much that it looks "washed out." OKAY.
Before going to step 43... |
 |
|
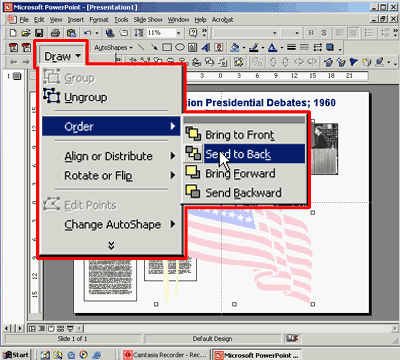
43. That looks pretty good. Now let's "send it to the back" behind all the other objects we've created. From the Draw menu (which is on the button bar) Select: Order > Send to Back |
 |
|
44. Great! Getting close now. Rearrange &/or modify objects to your desire. I've stretched the flag to fill the background width and added a white fill color to the two text areas that contain the transcript of the Kennedy-Nixon debate. See step 22 above if you are interested in doing that. I also enlarged the photo a good bit more- It's almost 20" wide and 15" tall now. I also cut some of the lead-in text (date, debate located, etc.) from the first text box, created a new text box and put that information on the poster in a more prominent (larger [32 point]-bolder) fashion. |
 |
|
WoW! Still here?! Well, Thanks for your patience. Make your poster and come visit the CET to get it printed. I hope that you've gotten something from this "How to..." page. There is still a LOT more that PowerPoint offers to poster makers, but this at least gives you the basics. If the staff here at Georgia Southern's Center for Excellence in Teaching can help you further please don't hesitate to contact us. E-mail: cet@georgiasouthern.edu or phone: 681-0049 |
||